

When I created divivoyager.com, I made sure to claim all the “digivoyager” usernames along with it— from Facebook to Instagram to X…
Unfortunately, I wasn’t able to claim digivoyager@gmail.com— that already belonged to someone else. So, I went along and claimed digivoyager7@gmail.com instead.
Now, there’s something about that extra “7” that doesn’t sit well with me. I wanted a cleaner looking e-mail.
So that’s when I unequivocally decided that I would need to get a business e-mail for my website. Pretty vain, I know.
Although there’s more to having a business e-mail than mere vanity. Using a business e-mail instead of a personal one can pretty much boost trust, credibility, and brand image.
Let me ask you, which e-mail would you trust more?
digivoyager7@gmail.com or michelle@digivoyager.com
I would also say the latter.
So, if you want to look more professional, it’s best to send from a business e-mail.
Claiming your Free Business Email with Hostinger
Now, if you already have a hosting plan with Hostinger, then it’s all a matter of claiming your free e-mail!
So, follow along in this tutorial and get started:
STEP 1
- Log on to your Hostinger account and go to https://hpanel.hostinger.com/emails and click on Setup

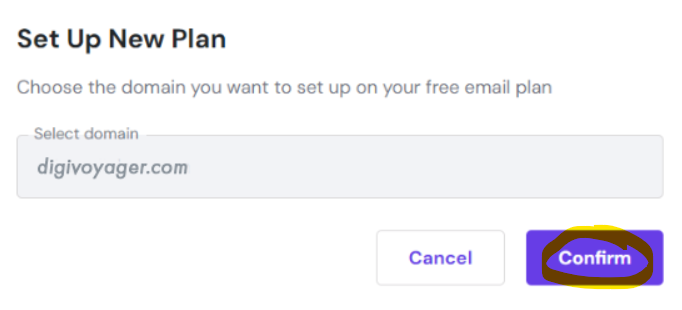
STEP 2
- Choose your domain name and click Confirm
STEP 3
- Select Hostinger Free

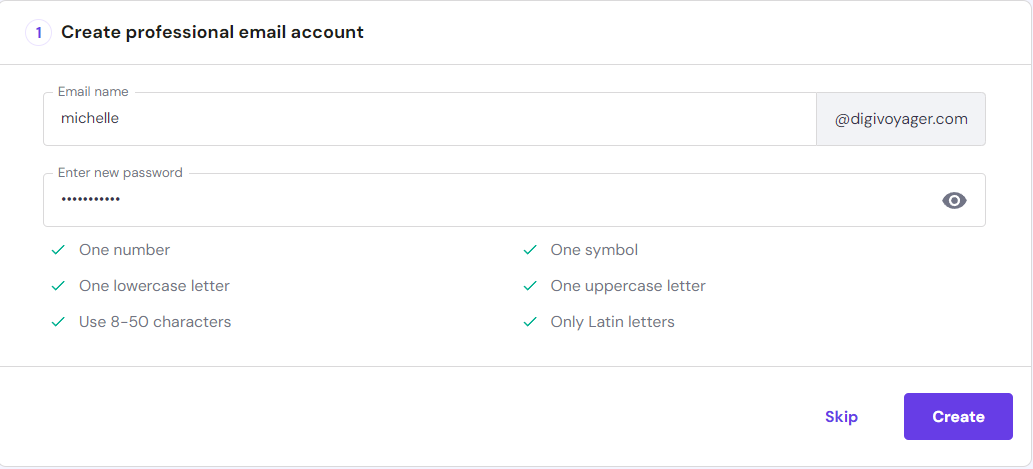
STEP 4
- Write your e-mail name and enter a new password, then click Create
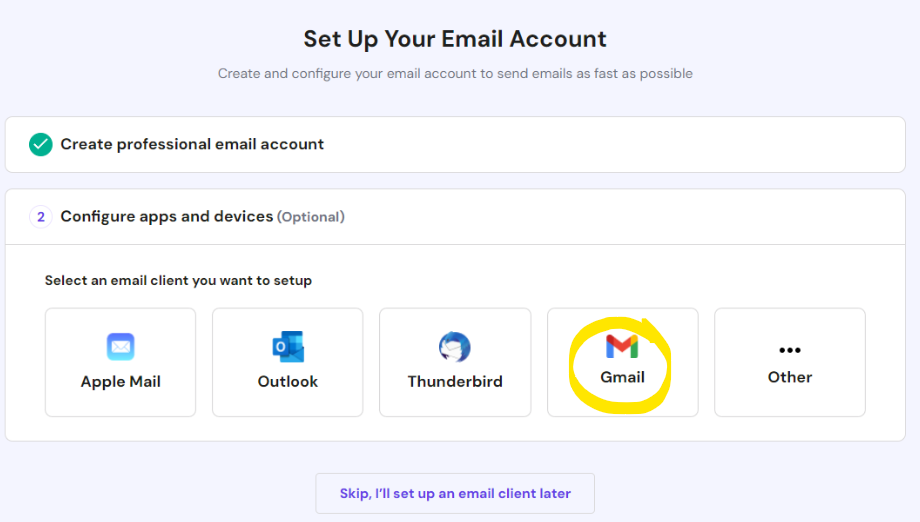
STEP 5
- Select Gmail
STEP 6
- Select Desktop

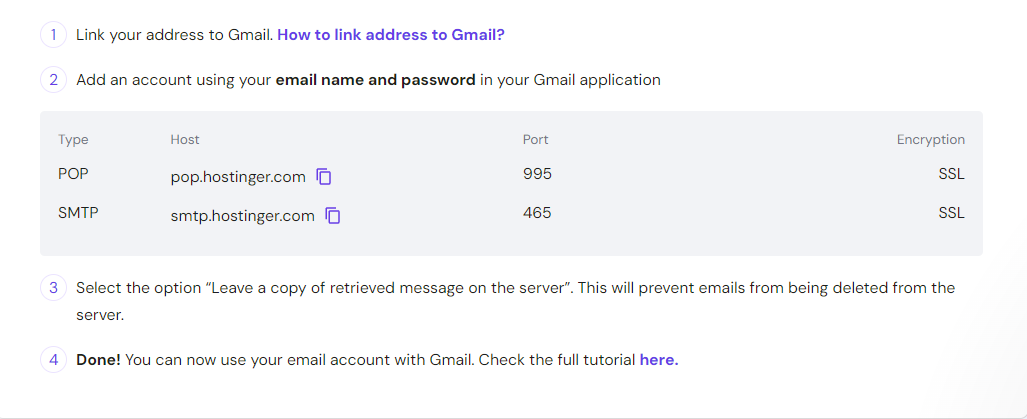
- Then you will be given these set of instructions, which you will follow along to in your Gmail account.
GMAIL STEP 1
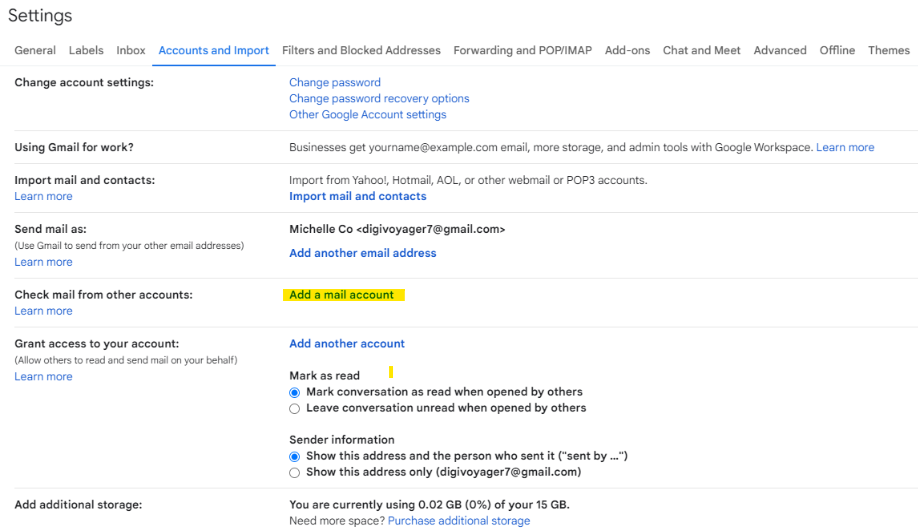
- In your Gmail account, click on settings, then See all settings

GMAIL STEP 2
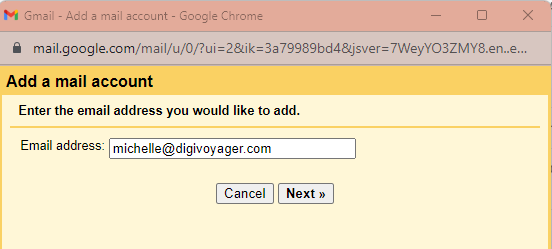
- Under Accounts and Import, Add a mail account.
- A pop up will appear, fill it up with your new e-mail address
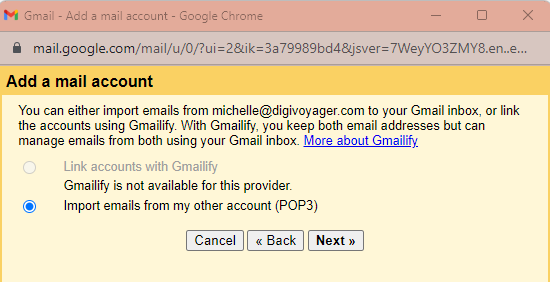
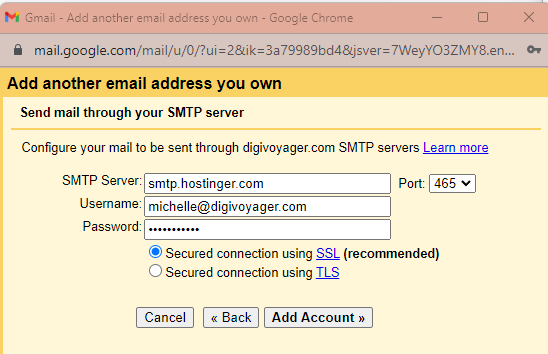
- Enter your username and password. Plus copy the other details below. Click Add Account.


- Copy the details below (of course with your own username and password) and click Add Account

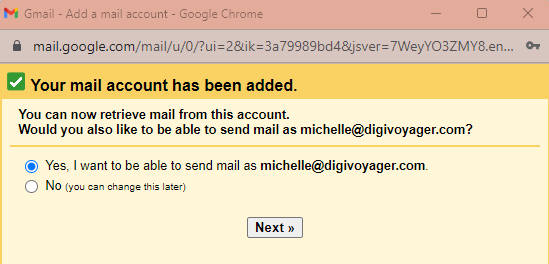
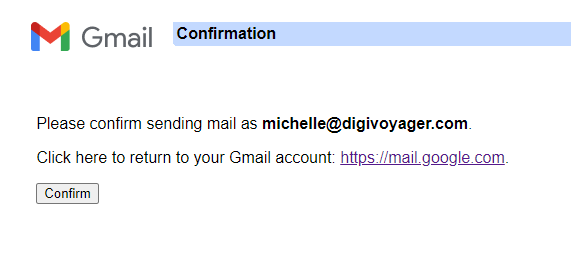
- You will receive a confirmation e-mail such as below:

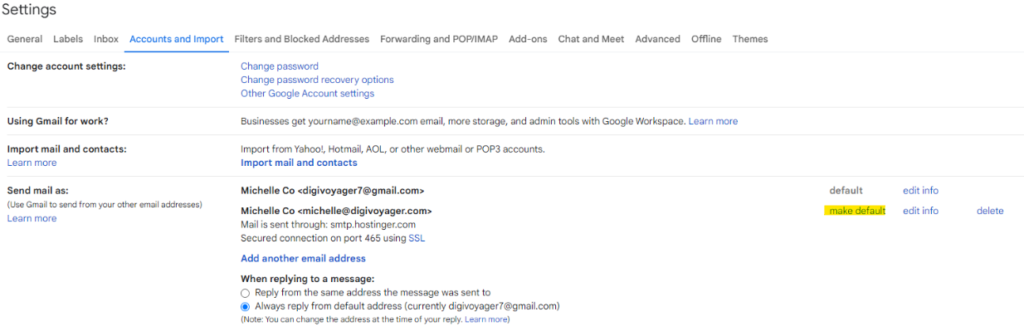
- Then go back to your Settings > Accounts and Import, and click on make default. So your new e-mail will be the default you send to!
…..and that’s a wrap. I hope you enjoy your new business e-mail address!
0 Comments