
In this guide, I’ll demonstrate how to seamlessly integrate a MailChimp Subscribe Form on a Divi Builder Website.
Cultivating an email list stands out as a crucial element in expanding your business. Creating a mailing list grants you the chance to directly share your updates and promotions with your audience via email.
From my perspective, MailChimp ranks among the top platforms for gathering emails and executing targeted marketing campaigns.
Now, in most cases you already have a Divi template, but there is an error that comes up when you try to subscribe.
In order to integrate Divi Builder with MailChimp, you first need an API Key.
STEP 1
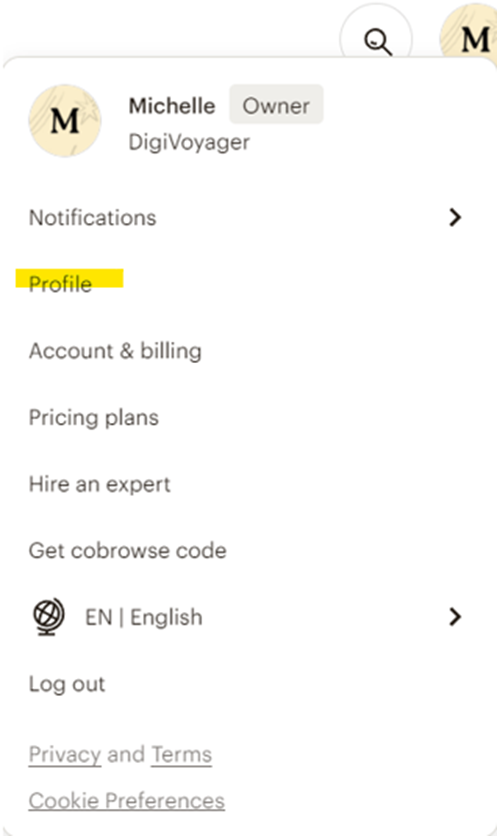
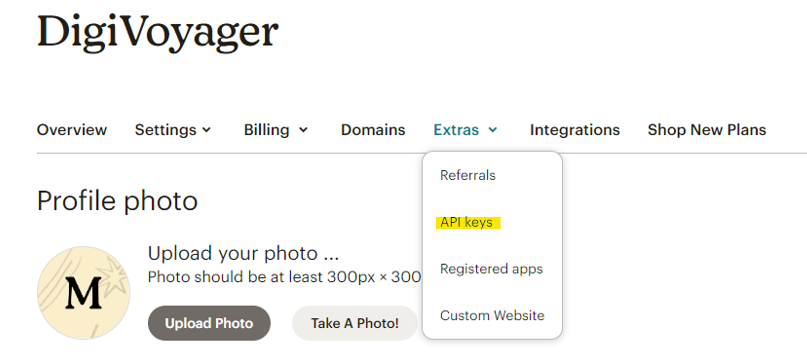
To get to the API Key, you need to go to click on the circle at the upper right corner then head to Profile > Extras > API Keys.
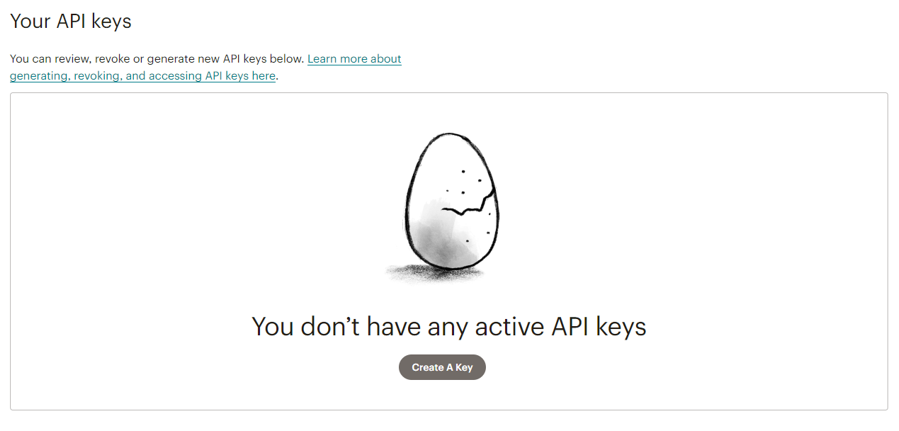
If you don’t have any existing active API Keys, this will come out.
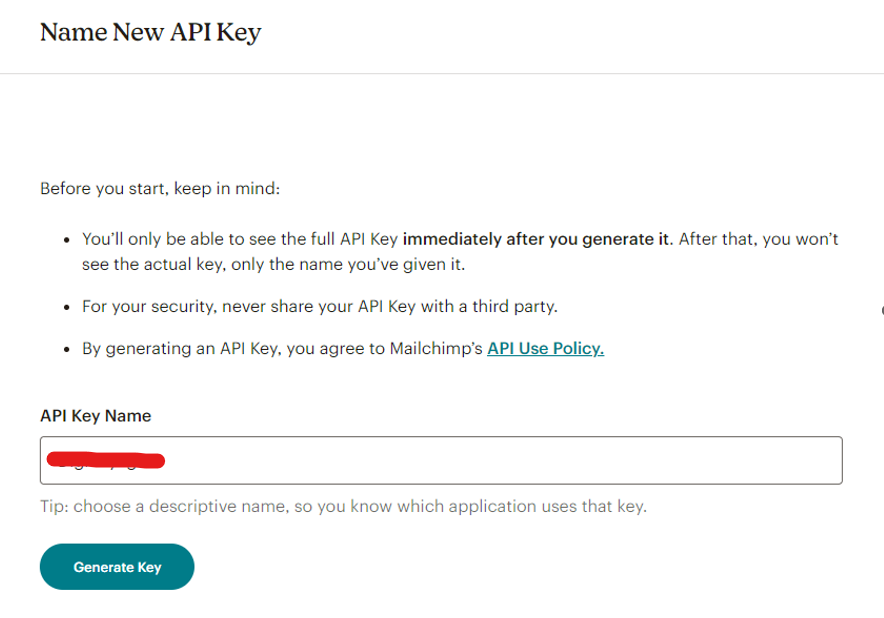
STEP 2
Next you name your New API Key and Generate Key. (You might want to use your website name-newsletter so you will know which one it is.)
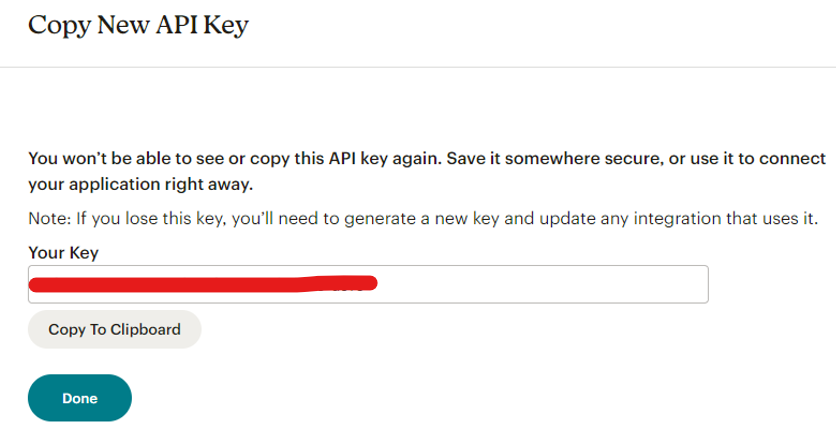
STEP 3
Copy your new API Key. Make sure to save it somewhere as if you lose this key you will have to generate a new key and update any integration that used it.
STEP 4
Go back to your website. Enable visual builder, then go ahead and click the Module Settings.

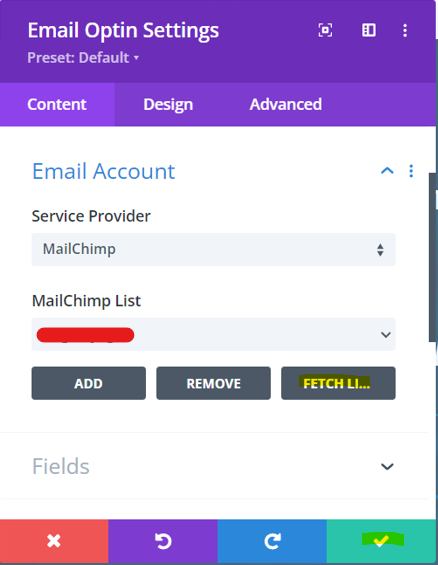
STEP 5
Under Content > Email Account, write an Account Name and paste the API Key you have copied. Click submit.

STEP 6
Choose MailChimp as the Service Provider and search for the name you chose under Mailchimp List. Click Fetch List and then Check that.
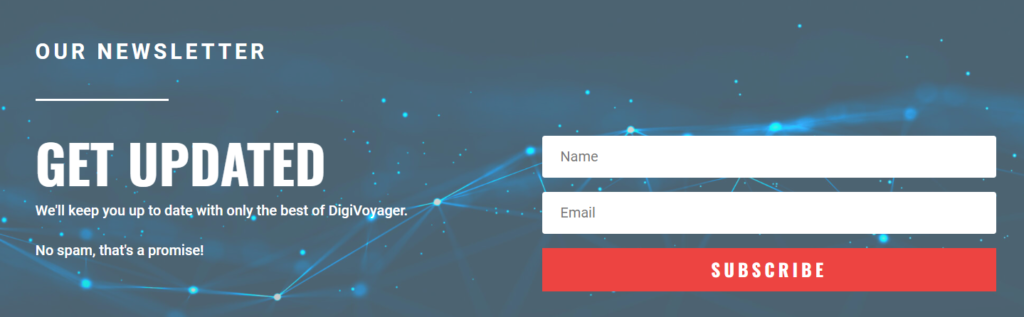
You now have a fully functional ‘Subscribe to Newsletter’ on your template!
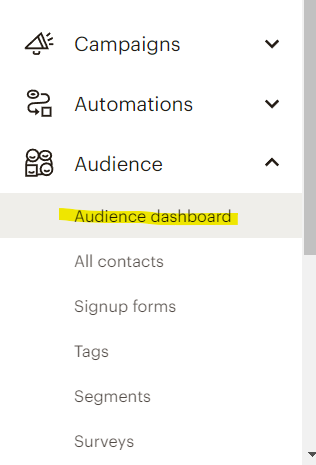
To check if it works, go ahead and subscribe with your name and e-mail. and you should get a Success! result.

Check on your MailChimp audience dashboard and you should have 1 new subscriber!
So that’s how you set up a Mailchimp subscribe form on a Divi Builder website.
If you have any questions, make sure to leave a comment and I’ll try to get back to you.